 R i d o l f a . eu
Laser Engraver
Published May 2019 in None
This Article is outdated.
The 3D_Printer is upgraded and doesn't have a Laserdiode now`
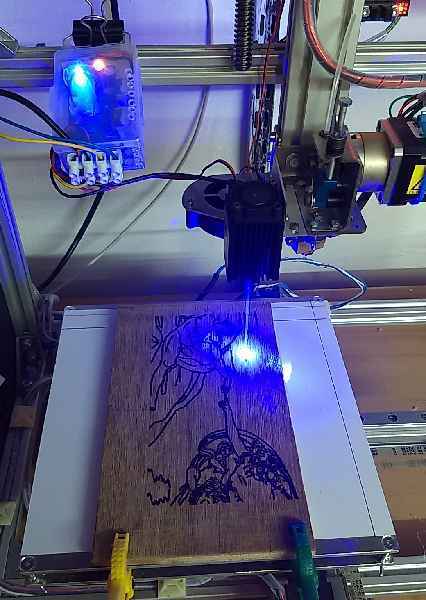
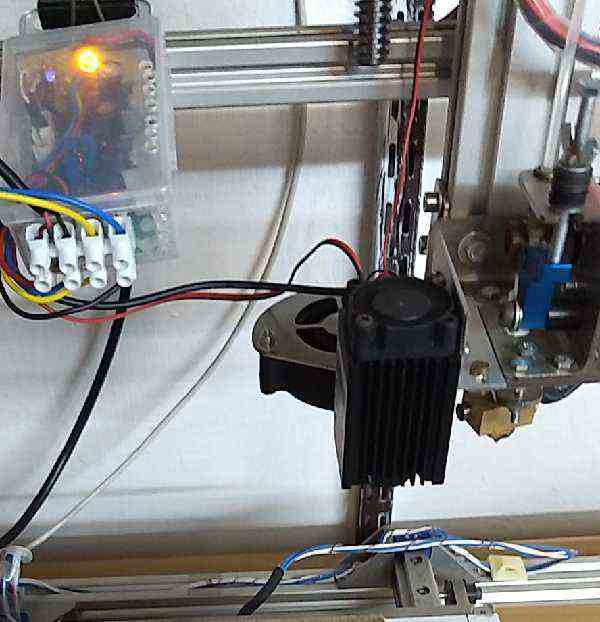
Mount a 1,5W laser on your 3D printer and your laserengraver is ready to go.
Recently I got an 1.5 laser module. It's one of these typical modules which are offered from popular Chinese or other shops. Mounted on my 3D printer, a nice Laser engraver is ready to use.
 |
 |
Beware of your eyes, always use protection glasses
My 3D printer is an open source RAMPS-1.4 printer with Marlin firmware and ArduinoMega2560 controller. I repurposed the FAN out to control the laser. The laser power is controlled by the FAN's PWM signal which is connected to the TTL input of the laser. A switch allows to use the FAN out as the default 3D printer FAN (on, off, rotation) or to control the laser. (on, off, laser-power) As the FAN out is a PWM signal and not a real off-switch, the laser module has got a separate power supply switch for safety reasons.
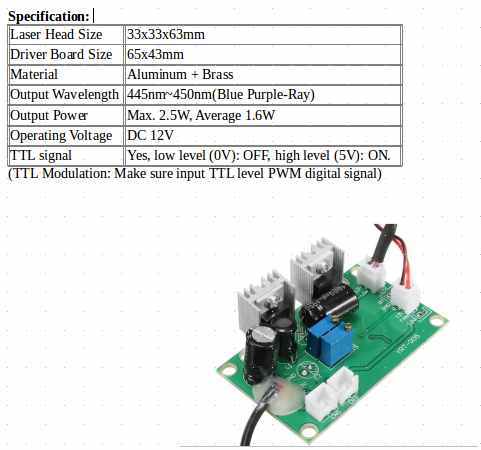 Laser specification Laser specification |
 engraved Image engraved Image |
Video 1 |
Video 2 |
Software tool chain
My printer host program is Repetier-Host. I use Inkscape to create the text or images and the jTechPhotonics extension to generate the gcode. Some G-Code commands can or must be changed. As these are only a few commands, I do it in a text editor with the search and replace option.
The mentioned "laser-engraverrsf-m200" printer in the template is my standard 3D printer configuration with a reduced working area due to the installation of the laser module on one side of the printer head.
The Laser template gCode can be downloaded here
Security advice
This website describes the development and implementation of personal hobby projects. It's a snapshot of a project status with specific boundary conditions and aimed to inspire other makers. A warrenty of any kind, especially regarding functionality, quality or compliance with technical regulations or safety rules is excluded.